Creating a basic split-panel console interface in Python (with i/o)
Started off with ethical hacking, but now I'm more of a developer. Grew up in the USA & UK. Currently at Western Carolina University.
Backstory
Choosing a library
My requirements were simple; I wanted two verticle panels. One that displays information that updates occasionally, another that acts as a console.
Initially, I was drawn to Textual. I had seen demos of what it could do not long ago, and it was impressive. They also provided an example of a split-pane layout. However, I could not figure out how to print to one of the panes. The documentation was confusing, and either I couldn't find the relevant section or it just didn't exist yet, so I gave up with that.
After contemplating writing one myself, I eventually stumbled upon talk of rich (from the same organisation as Textual) being used to create a split screen. I had used rich before. It's simple. I like it. They had a new feature, called Live, that would run a loop displaying updated information. All I needed was a way to use all those print and input statements.
Turns out, rich wasn't exactly the most suited for such a task, either. But, thanks to the help of @zuhataslan on GitHub, I had everything I needed to put it together.
Building the framework
I decided, to make things as simple as possible, I was going to achieve this split screen with a simple table. This seemed to be the easiest way of dividing the screen. So I created a basic class:
from rich.live import Live
from rich.table import Table

class TUI(object):
    def __init__(self):
        self.table = Table(title='1337GPT') # title of my application
        self.table.add_column('Data') # left pane
        self.table.add_column('Console') # right pane

# ensure that it works
import time
tui = TUI()
with Live(tui.table, refresh_per_second=4):
    for i in range(100):
        tui.table.add_row('b' * i, 'a' * i)
        time.sleep(0.2)
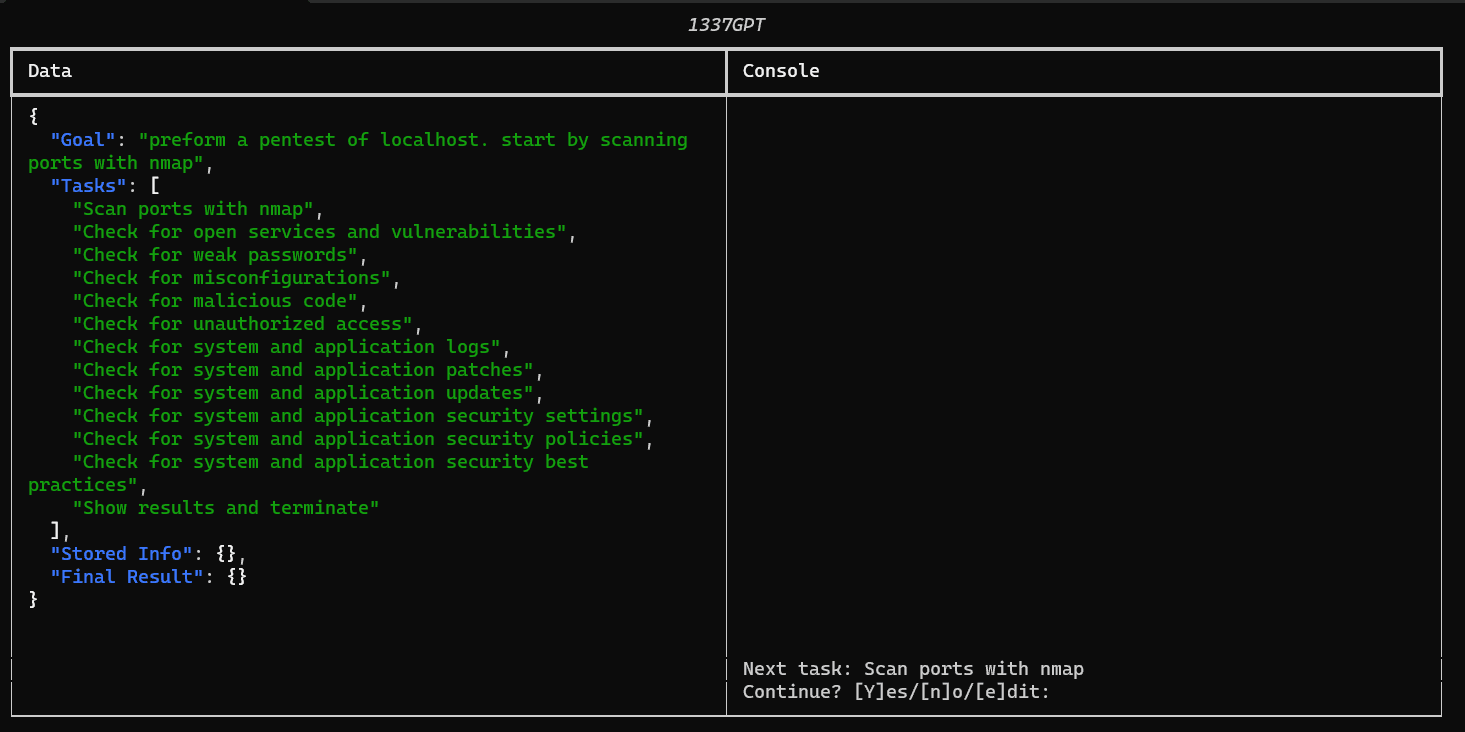
The last bit is just how I tested it to see how everything would look. Which, was something like this:

Alright. Good starting point. Next I wanted to expand the table so that it took up the whole terminal window. To do that, I used the get_terminal_size from the built-in os library. Since there's not much code so far, I'll just show you the whole updated file.
from rich.live import Live
from rich.table import Table
import os

class TUI(object):
    def __init__(self):
        # give us some slack for the max line size
        # this accounts for the "|"s when formatting the table
        self.max_lines = os.get_terminal_size().lines - 7
        self.total_cols = os.get_terminal_size().columns - 4

        # if total_cols is odd, make it even
        if self.total_cols % 2 == 1:
            self.total_cols -= 1

        # length of characters in each pane
        self.half_cols = self.total_cols // 2

        # make the table
        self.table = Table(title='1337GPT')
        self.table.add_column('Data')
        self.table.add_column('Console')

        # create some empty rows
        for i in range(os.get_terminal_size().lines - 7):
            self.table.add_row(' ' * self.half_cols, ' ' * self.half_cols)

    # this function will be useful later for padding text
    def pad(self, text):
        return text.ljust(self.half_cols)
Now, by experimenting in the Python console, I found out a little more about how rich's tables work. See, the only method that was shown in the documentation for adding data was table.add_row, which would update both "panes" at the same time. To work around this, I found out that once I had all those blank rows, I could simply replace a single cell using table.columns[0]._cells which contained a list of cells within the first column.
Next, I created a Console class which would allow me to interact with the right pane as if it were a console.
# update the second import
from rich.table import Table, Row

# ... other code above

class Console(object):
    def __init__(self, tui: TUI):
        self.tui = tui # to access the table contained within
        self.history = [] # for when we run out of space for lines

    # gets the current "lines" in console
    def getlines(self):
        return self.tui.table.columns[1]._cells # columns[1] is the Console

    # adds a line
    def add_line(self, line: str):
        # padding it ensures the width of the table remains the same
        line = self.tui.pad(line)

        # "scroll down" and add line
        lines = self.getlines()
        self.history.append(lines.pop(0)) # preserve history
        lines.append(line)
        self.tui.table.columns[1]._cells = lines # update table
This method of adding a line to the "console" ensures that it will always have the same number of rows so that we can always see the title of the table (and application) within the current terminal view.
Now, we need an input method. This will be awkward to implement, as the rich Live changes how inputs behave. Anything printed (including input prompts) will be displayed above the table - which is not what I want. Here's how I added this functionality myself (the ... represents code which was shown earlier).
# we need the getch function to get a single character during the Live loop
if os.name == 'nt':
    # windows
    from msvcrt import getch
else:
    # linux based
    from getch import getch

class Console(object):
    def __init__(self, tui: TUI):
        ...
        self._input = ''

    # updates the text of the last line
    def update_last(self, text: str):
        lines = self.getlines()
        lines[-1] = self.tui.pad(text)
        self.tui.table.columns[1]._cells = lines

    # our print function
    def print(self, *args):
        args_str = map(repr, args) # convert to string representation
        args_line = ' '.join(args_str) # list to string
        self.add_line(args_line) # "print"

    # our input function
    def input(self, prompt: str):
        # print the prompt
        self.add_line(prompt)

        # loop until input is done
        while True:
            ch = getch().decode() # gets a single character
            if ch == '\x03': # Ctrl+c
                raise KeyboardInterrupt
            elif ch in ('\n', '\r'): # new line characters means we're done
                inp = self._input
                self._input = '' # clear it for next time
                return inp # return the value - exiting the loop
            elif ord(ch) == 127: # backspace
                self._input = self._input[:-1] # remove last char
                self.update_last(prompt + self._input) # update line
            else: # valid char
                self._input += ch # add it to the input
                self.update_last(prompt + self._input) # update line
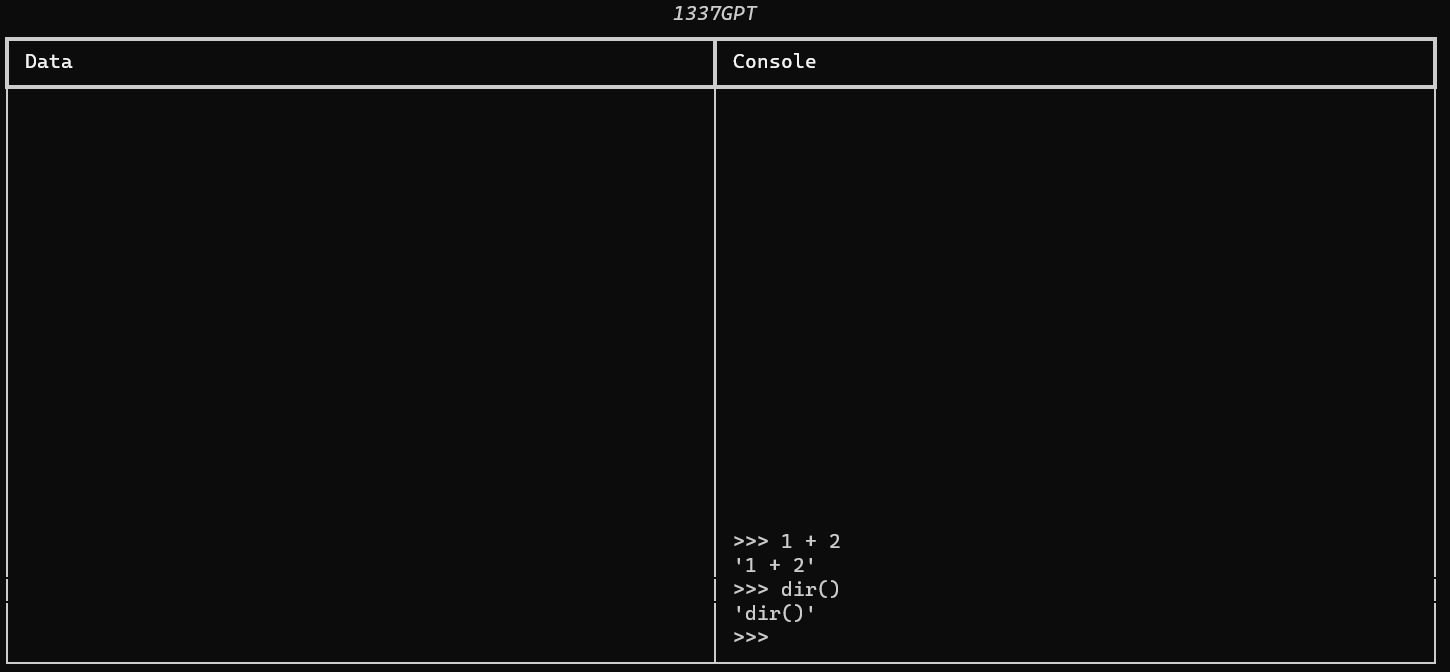
Surprisingly, this works! Here's an example of how you would use it all together:
# put this at the end of the file
tui = TUI()
console = Console(tui)

with Live(tui.table, refresh_per_second=10): # increased refresh for typing
    while True:
        cmd = console.input('>>> ')

        if cmd in ('exit', 'break', 'exit()'):
            break

        elif cmd:
            res = eval(cmd)
            console.print(cmd)
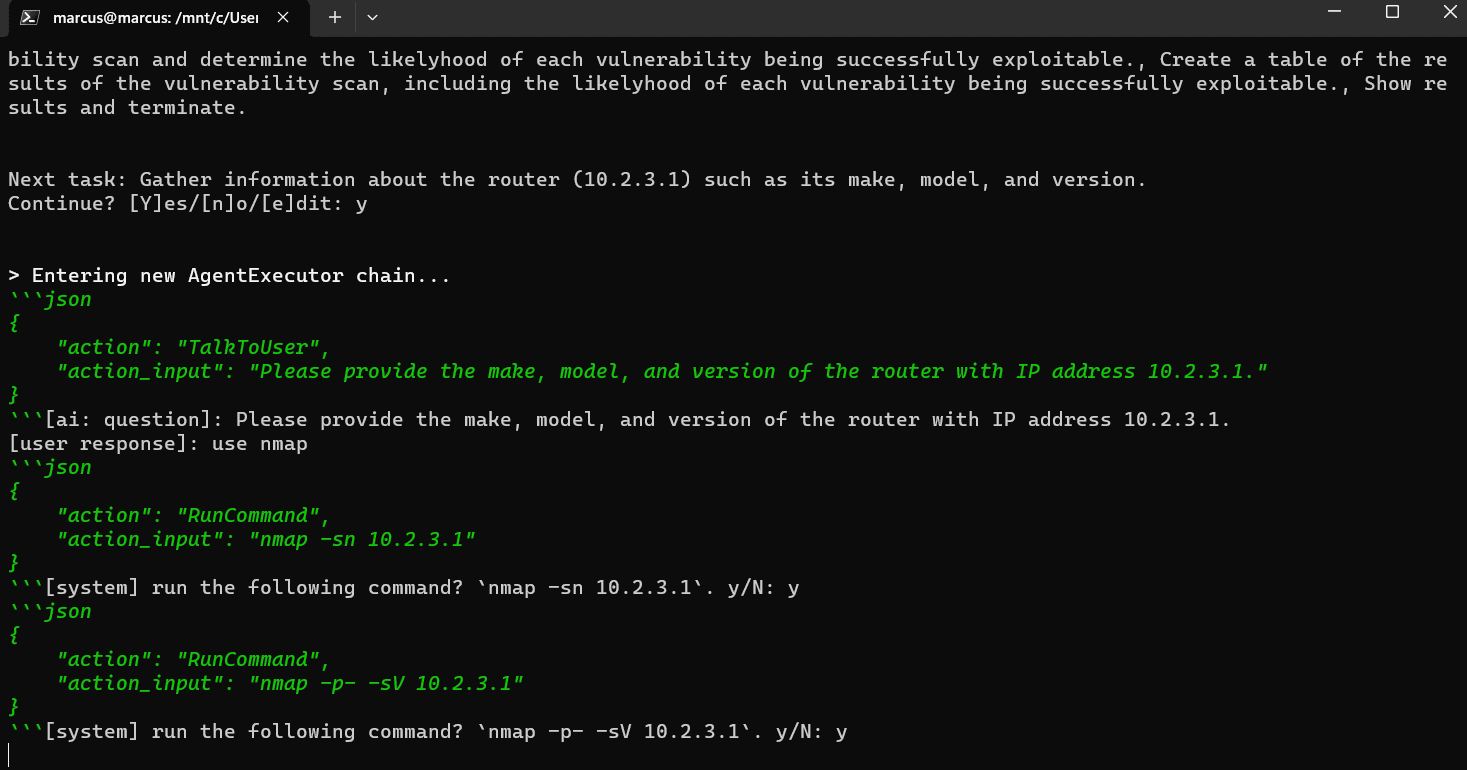
Use with 1337GPT
If you want to see how I integrated it with my AI Task Manager (used in 1337GPT), you can view the finished source code, here!